
Blog Getting Started Guide
A fairly detailed guide to deploying a blog, written for myself—and for you.
Preface#
In this digital era, we are used to sharing life on social media and listing skills on resumes. But those platforms are ultimately someone else’s space—full of formatting constraints and information noise. Have you ever thought about having a unique online space that you fully control?
Many people may feel that building a cool-looking website is complex and expensive: you’d need to learn the whole HTML/CSS/JS stack, and also understand backend, databases, and server operations. But the truth is, with modern tools, it’s much simpler than you think—and it can even be completely free. This tutorial is meant to be a complete guide that takes you from zero to one, as step-by-step as possible, to build and deploy a high-performance, easy-to-maintain personal website. Even if you have no programming background, as long as you follow the steps, you can have a homepage of your own. That doesn’t mean you need no technical accumulation at all, though. As I said in the introduction of this blog, I’ll write as detailed as I can from a beginner’s perspective. Thanks to all open-source contributors—they helped me, and I want to pass that spirit on to help more people.
Part 1: The Basic Logic of Modern Website Building#
Just like learning a new course at school, before we start solving problems hands-on, we need to understand the concepts and the logic behind them. As the saying goes: without a solid foundation, everything shakes. So before we start, let’s spend a few minutes on some core concepts—this will make the following steps much easier.
What is a static website?#
You may have heard terms like frontend, backend, and database. Simply put, the backend and database handle dynamic data that requires real-time interaction (such as user login or comment submission). But for many personal homepages and blogs, the core content—articles, images, and personal introductions—doesn’t change frequently.
The core idea of a static website (Static Website) is to generate this content ahead of time into standard HTML, CSS, and JavaScript files. When a user visits, the server directly sends these ready-made files to the browser—no server-side dynamic computation is needed.
Why choose a static site for a personal homepage?#
Another new question—and honestly I don’t fully know either, so let’s just hear what the AI says. For personal projects, static websites are an almost perfect choice because they offer:
- Extreme speed: users download ready-made files directly—no waiting for server processing or database queries, so pages load fast.
- Higher security: with no backend and database, the risk surface is greatly reduced.
- Very low cost: static hosting is cheap, and many excellent platforms even provide free hosting (like Vercel, which we’ll use later).
- Simple deployment: you just upload the built files to any place that can host files, and the site becomes accessible.
Common platforms such as GitHub Pages and Vercel all support deploying static pages. So we only need to upload the build output to these platforms to deploy the site.
Embrace modern frontend frameworks#
Modern frontend frameworks (such as Astro, Vue, React) let developers organize code in a more efficient and modular way (for example, writing Markdown posts or assembling pages with components). Although you write files like .jsx, .astro, or .vue during development, these frameworks eventually use build tools (such as Vite, Webpack, Rollup, etc.) to convert your code into HTML, CSS, and JavaScript that browsers can understand. This build process is like “translation”: it translates higher-level code into a language the browser can “understand.”
Going further, countless developers have built templates on top of these frameworks to make it easier to create blogs and similar sites. This means you don’t have to start from scratch. You just need to find a template you like, and then fill in content—like updating your profile and writing posts—within the structure the author has already prepared. The template has already handled 99% of the complex technical details. Of course, the remaining 1% is on you—writing the actual content. Blogging can really train your patience and mindset. Especially with generative AI being so convenient nowadays, we still need a belief that keeps us going. I think my belief is: writing a blog to save my desire to share.
Part 2: Hands on! From zero to one#
Ok, theory is finally done—let’s roll up our sleeves and get practical! The whole process is divided into seven steps.
Follow along and, step by step, you can build your own website, edit it locally, push it to the cloud for automatic deployment, and bind your own domain (or use the free domain provided by the platform).
For complete beginners, some steps below may feel obscure because they involve knowledge you haven’t encountered. Don’t worry—don’t try to understand everything at first. Just follow the steps and get it running. After step three, you’ll already have an accessible website and some positive feedback, and then you can calm down and keep going.
Step 1: Prepare a local development environment (Node.js)#
To run a modern frontend template, your computer needs an environment called Node.js, which is the foundation of the whole JavaScript toolchain. Although writing plain text locally and uploading it is also an option, if you want real-time feedback after each edit, you’ll still need a local environment.
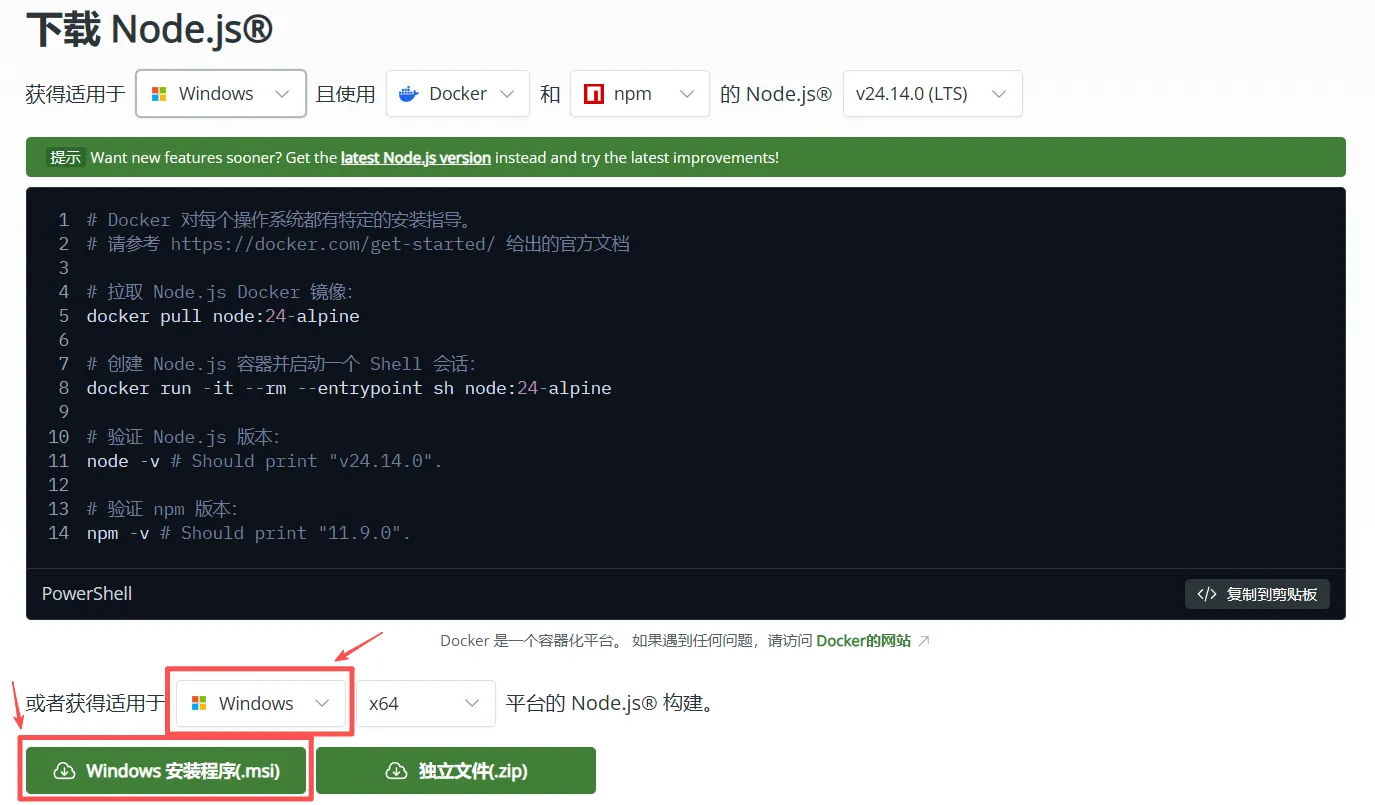
- Install Node.js
- windows: Go to the Node.js official site ↗ and download the prebuilt
.msiinstaller. Double-click and install it like normal software.
- Ubuntu:
sudo apt update
sudo apt install -y nodejs npm
# Recommended: use n to manage Node.js versions, so you can easily switch to the latest stable version
sudo npm install -g n
sudo n stable
hash -r # Refresh shell cache so the new version takes effect- Verify the installation and install pnpm
Open your terminal (Windows users can use PowerShell or CMD) and run the following commands to check whether the installation succeeded:
node -v
npm -vIf you can see version numbers, Node.js and its package manager npm are ready. We recommend a more modern and faster package manager: pnpm. Also, for some frameworks, bun is recommended for installing dependencies.
npm install -g pnpm
npm install -g bunStep 2: Choose and download a template#
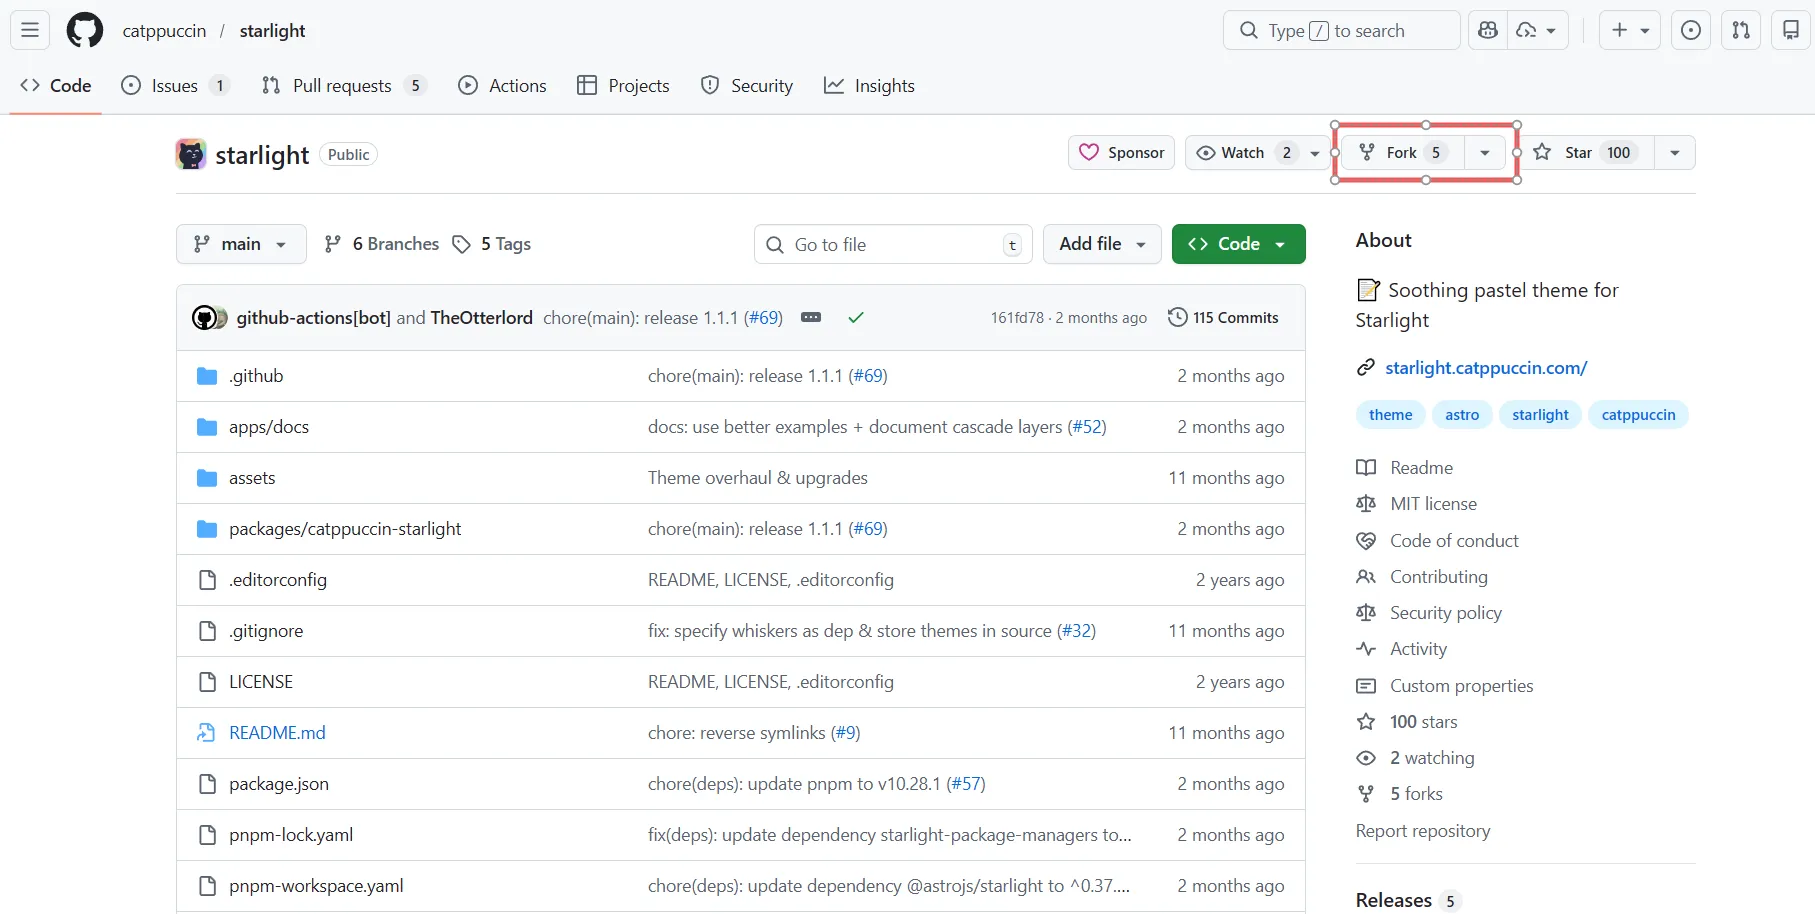
We don’t need to design from scratch. There are tons of great open-source templates online. You can pick one you like from these Astro themes ↗, or search on GitHub for keywords like “astro theme” or “vue portfolio”.
After you find a template you like, you can directly Fork it to your GitHub account, then clone it to your computer and start editing. (I’ll write a separate blog post about Git and GitHub tutorials in the future; for now, this blog assumes you already have some basic Git/GitHub knowledge.)
Step 3: Run your website locally#
After the previous step—cloning the blog source code to your computer—your website code is already on your machine. Next, we’ll make it run with just a few simple commands.
- Enter the project directory
It’s best to open the whole project with VS Code (at least you should know how to use it). First, in your terminal, go into the template folder you just downloaded. If you’re not in that folder yet, use cd.
cd path/to/your/project- Install dependencies (
install)
Every project depends on third-party libraries. The package.json file in the project root defines all required dependencies. This is exactly like pip install -r requirements.txt for Python users.
- If the project recommends
pnpm(there is apnpm-lock.yamlfile in the root), run:
pnpm install- If the project recommends
bun(there is abun.lockbfile in the root), run:
bun install- If neither exists, use
npm:
npm installThis command downloads all dependencies into the node_modules folder. If the cloned project already contains a node_modules folder, it’s best to delete it first and then run the command above.
- Start the dev server (
dev)
After dependencies are installed, run:
pnpm dev # Or npm run dev, bun dev (depending on which install command you used above)After running the command, the terminal will show a local URL, usually something like http://localhost:4321. Copy and open it in your browser—congratulations, your website is now running locally!
Even better, it supports Hot Module Replacement (HMR). Now whenever you modify any source file (like a post), the browser page will refresh automatically and show your changes in real time.
Step 4: Personalize your content#
Now that the local site is running, it’s time to make it yours. As a template user, your work is straightforward and mainly focuses on two things:
- Edit configuration files: In the project root, find configuration files like
astro.config.mjs,_config.yml, or similar. Open them and change things like site title, author name, social links, etc. to your own. - Manage content files: For blogs, there is usually a
src/content/blog/orposts/directory. You only need to add, edit, or delete Markdown (.mdor.mdx) files in that directory, and the post list and pages will update automatically.
Step 5: Push your work to GitHub#
After you’re satisfied with your local personalization, you need to upload the code to GitHub. This is not only a good backup habit, but also the key step for automated deployment.
If you cloned someone else’s repo directly via git clone, you can delete the .git folder first and then run git init to initialize a new repository.
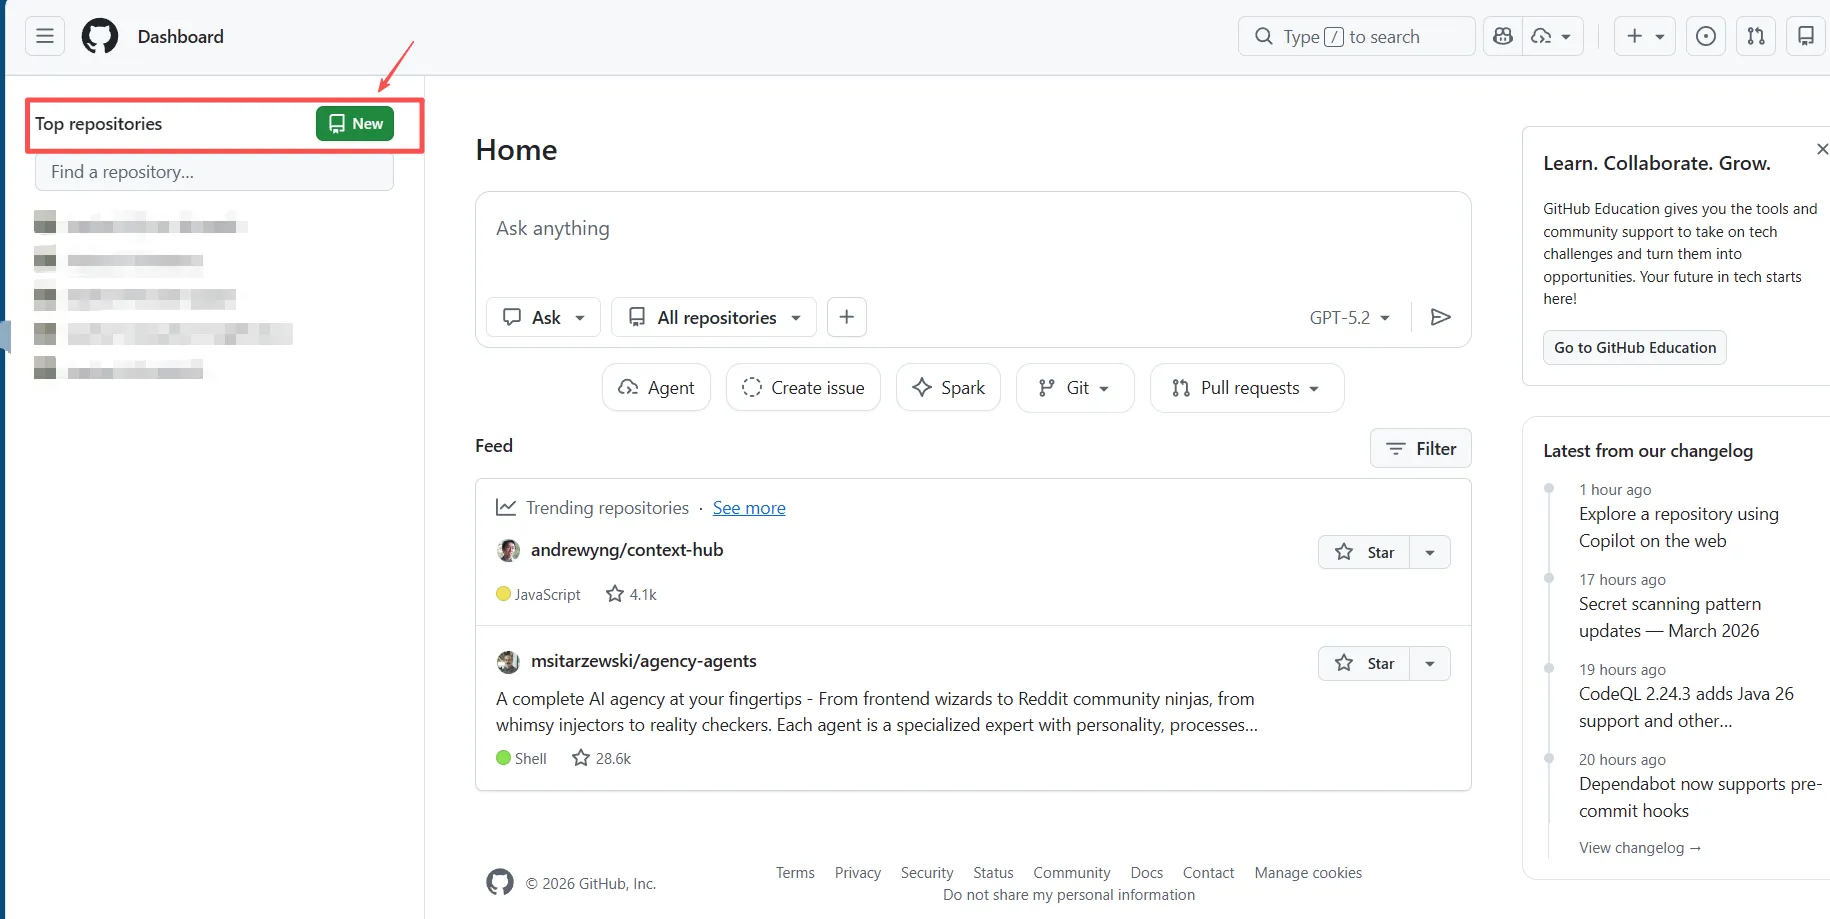
- Create a new empty repository (New Repository) on GitHub ↗.
-
Follow GitHub’s instructions and run the following commands in your local project folder to push code to the new repository:
bashgit init git add . git commit -m "Initial commit: My personal website setup" git branch -M main git remote add origin [your repository HTTPS or SSH URL] git push -u origin main # Or git push --set-upstream origin main
If you originally cloned from your own repository, you can simply run git push to push to the remote.
Step 6: One-click deploy with Vercel#
Now that the code is on GitHub, it’s time for the most exciting step: making your website accessible to the world. We’ll use Vercel, a powerful free platform.
For now, we won’t cover the GitHub Pages setup. We’ll first explain Vercel so the overall system is more complete. Another reason is that while GitHub Pages is free, it requires manual configuration of the build pipeline (GitHub Actions), and operations like custom domains can be relatively cumbersome. Vercel truly delivers “zero-config” automated deployment. (Later I’ll also introduce dual-platform deployment on both GitHub Pages and Vercel.)
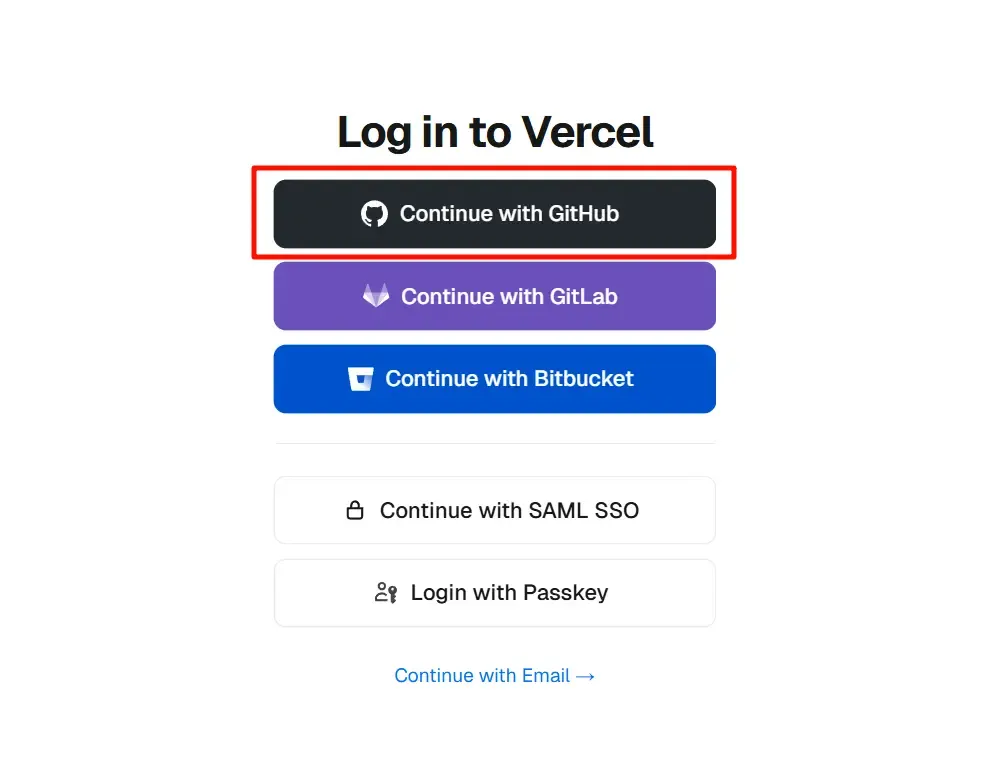
- Log in to Vercel with GitHub
Go to Vercel ↗, click “Login” in the top-right corner, and choose to authorize with your GitHub account.
- Import our project
After logging in, on the dashboard click Add New… → Project. Then choose your account and install Vercel.
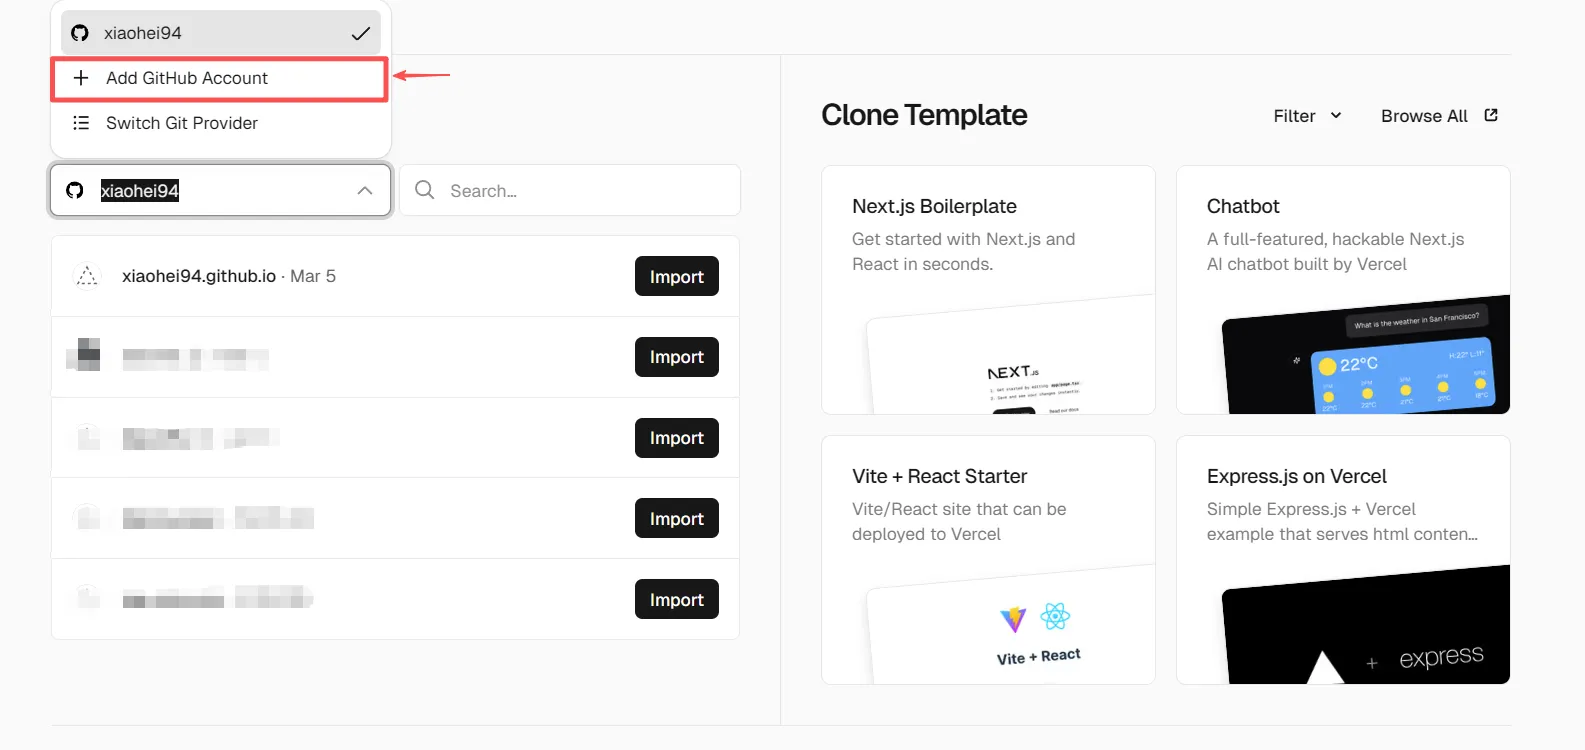
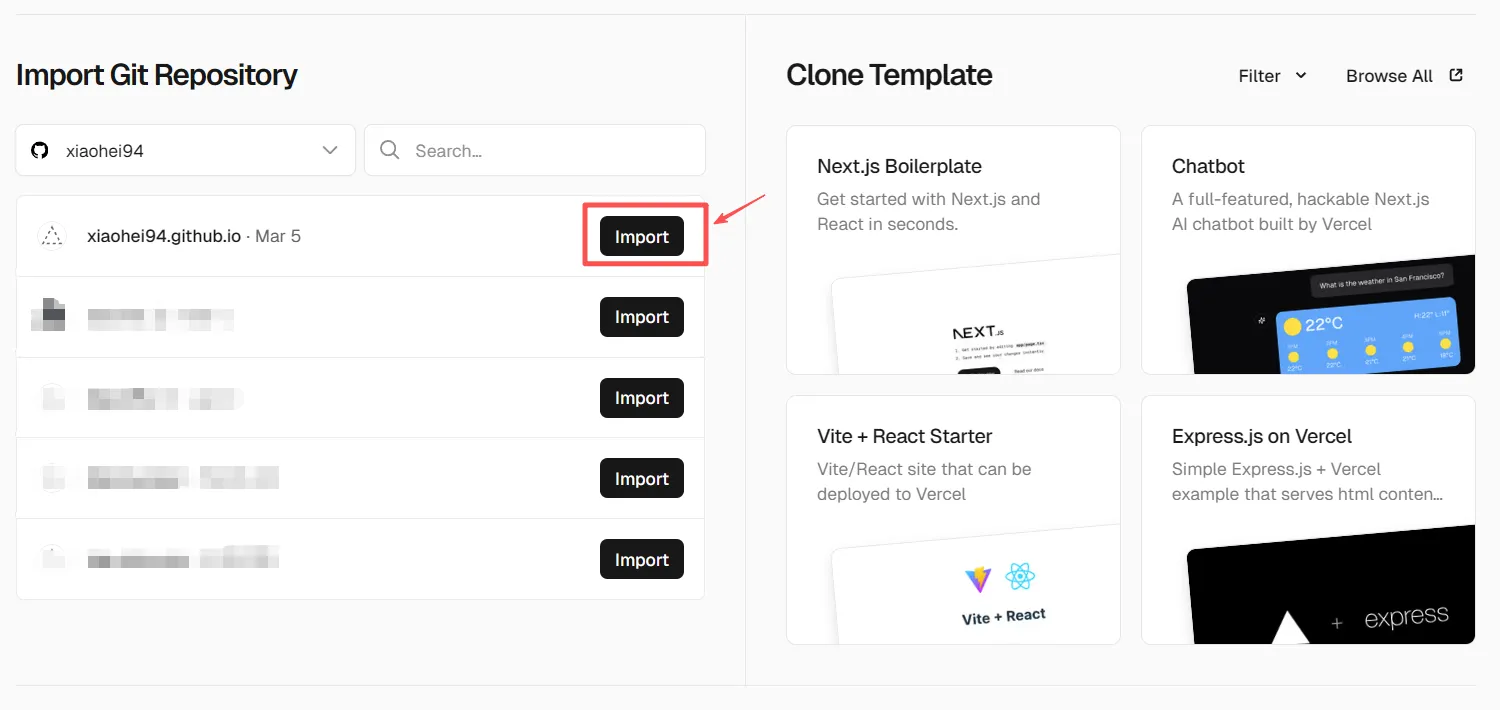
Vercel will list your GitHub repositories. Find the website repo you just created and click the Import button.
- Deploy! Vercel will automatically detect your framework (Astro, Next.js, etc.) and fill in all build settings. You don’t need to change anything—just click the
Deploybutton.
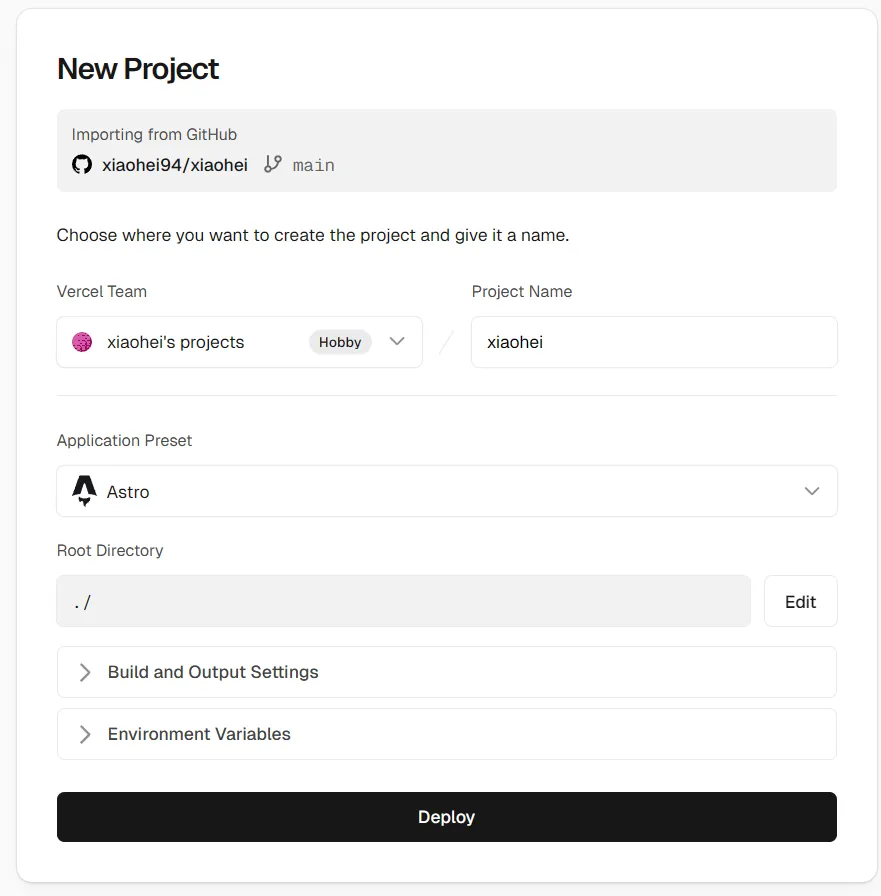
Wait a moment—Vercel will finish building and deploying. When you see the celebration animation, your site is live! Vercel will provide a free domain ending with .vercel.app for you to access.

At this point you can share this link with your friends. Of course, you can also bind your own domain later in Vercel settings.
From now on, you only need to modify code locally and git push to GitHub. Vercel will automatically pull the latest code, rebuild, and redeploy your site—fully automated!
Summary#
Congratulations! Starting from an idea, you now have a personal website that can be deployed easily—you’ve walked through one of the most mainstream and efficient paths in modern Web development. Of course, after you use it for a while, you’ll feel this is not the end. If we want our personal site to be more feature-complete, we still have a road ahead. If you want to keep exploring, follow my steps—we’ll continue.
At the same time, you’ll find the core of this workflow is “focus on content, not tools”. Most of your future time will be spent on creative work like writing posts and updating projects, rather than fighting server configuration.
More importantly, what you learned today is highly extensible. It’s not only for personal blogs. Any static website template built with a similar workflow—whether it’s a product landing page, an online resume, or a documentation site—can be deployed in exactly the same way.